Merchants
Creating Merchant
To see and search all Merchants, go to Settings -> Users -> Merchants, then in order to create new Merchant press to + New Merchant button:

Below are all the fields available for filling in:
Field name |
Description |
Necessity |
|---|---|---|
Login |
Login which is required while logging in the system. Cannot be changed after creation. |
Required |
Password |
Password for login. In order to change it, contact support. |
Required |
Display Name |
Merchant name which will be displayed. |
Required |
Contact E-mail which will be added to this Merchant account. |
Required |
|
Control Key |
Secret key which will be used for signing requests. |
Required |
Payment group |
Currently not in use. “Common” is a default value. Cannot be changed after creation. |
Required |
Name |
Shows Merchant’s contact person name. This name will be displayed only in merchant details. |
Required |
Surname |
Shows Merchant’s contact person surname. This name will be displayed only in merchant details. |
Required |
Business type |
Will show which business type Merchant has. |
Optional |
Returning customer approve sessions count |
Shows after how many approved transactions, Payer will be considered as Returning for Merchant. |
Optional |
Registration country |
Shows Merchant country. |
Optional |
Merchant site URL |
Merchant site URL can now be set on Merchant details screen and included in E-mail notifications (MERCHANT_SITE_URL macro). |
Optional |
Organization |
Shows Merchant’s organization name. |
Optional |
Tags |
Shows tags by which Merchant can be found later in system. |
Optional |
API descriptor |
Manager can set API descriptor parameter in the Merchant profile. This value will be returned instead of gate values specified in Gate Details. |
Optional |
Merchant details
Linked Endpoints

Account balance
Introduction
First balance is funded by sale transactions and defunded by payout transactions and is set up for USD currency, also Merchant rates applied for sale transactions. Second balance has override for sale transactions which will deduct balance with amount calculated from manager rate plan.
Below is the example of fully configured balance with highlighted steps.

Account configuration
Merchant’s accounts can be configured via Accounts tab. See example of accounts window below:

Application Rate Direction
Transactions with rate only can select both ADD and DEDUCT. For each transactions apply rate can be specified differently. For example, if it is needed to deduct a commission for a Payout transaction in addition to deducting the amount of the Payout itself then need to choose DEDUCT in the Apply direction configuration.
Application Impact on Balance
Different types of transactions count differently when calculating balances. List of application impact on balance is shown in the table below:
Transaction type |
Impact on balance |
|---|---|
sale |
Add |
capture |
Add |
dispute |
Add |
chargeback_reversal |
Add |
arbitration |
Add |
payout_cancel |
Add |
chargeback |
Deduct |
prearbitration |
Deduct |
reversal |
Deduct |
payout |
Deduct |
transfer (deposit2card) |
Deduct |
preauth |
Rate only |
cancel |
Rate only |
fraud |
Rate only |
retrieval |
Rate only |
pan_eligibility |
Rate only |
create_card_mapping |
Rate only |
update_card_mapping |
Rate only |
inquire_card_mapping |
Rate only |
delete_card_mapping |
Rate only |
mfo_scoring |
Rate only |
account_verification |
Rate only |
void |
Rate only |
Rate Types
For each type of transaction, Manager can separately apply the rate (commission). Possible rate types are:
Nothing
Merchant
Reseller
Manager
Dealer
Acquirer
Date Bumping Functions
ASAP - crediting funds without delay. Doesn’t include STH and Rolling Reserve.
ASAP_plus_RR - crediting funds ASAP and counts Rolling reserve. Doesn’t include STH.
DAY + n - crediting funds from STH after the specified number of days + Rolling Reserve.
BDAY + n - crediting funds from STH after the specified number of business days + Rolling Reserve.

Add account configuration
To create new account balance, add account configuration and balance:
To add new account configuration press +Add button in configuration field and set up the transaction type and rates, which will add or deduct funds from balance by settings described in Accounts Configuration. Optionally, gate and endpoint can be selected - if they are left empty, balance configuration will work for all gates and endpoints of selected Merchant.

Balances
Add balance
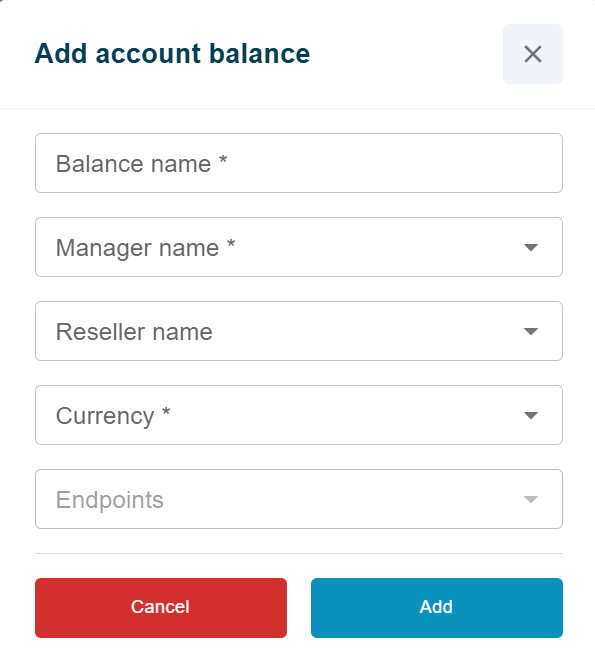
To add new account balance press +Add button in account balances field and set up balance and manager name and currency. Detailed setting of account balance is described below in this section.
Types
There are four types of funds for each balance:
Balance Total
Balance Total - amount of funds calculated based on configuration, including STH and RR.

Balance Live
Balance Live - amount of funds calculated based on configuration, excluding STH and RR.

Example
Balance Live = Balance Total - STH - RR.
Short-Term Holds
Short-Term Holds - amount of funds calculated based on the Date bumping function.

Example
Transactions passed today from 11:01 to 11:59 will be credited at 12:01 on the day on which they should be credited according to the parameter DAY + n or BDAY + n.
Rolling Reserve
Rolling Reserve (Long-Term Holds or Holds from Rate Plan) - amount of funds calculated based on the rate plan hold. Max Rolling Reserve - a limit on the amount of Rolling Reserve.

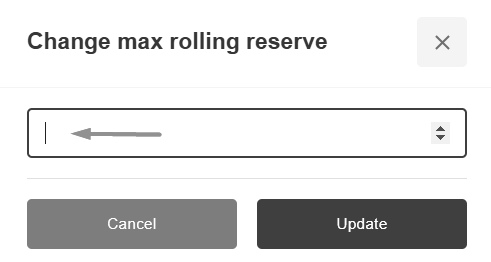
Max Rolling Reserve can be changed in the Change Max Rolling Reserve window that appears. To set or edit the Max Rolling Reserve, click on the value -.
Warning
Rolling reserve will be credited to balance on Transaction Date + Period from Rate Plan + 1 day. When the Max Rolling Reserve limit is reached, the total amount of hold funds will not increase and the Rolling Reserve calculated from next transactions will be added to balance live instead. Also, If the Max Rolling Reserve is set later and is less than the current accumulated Rolling Reserve, then the Rolling Reserve calculated from next transactions will be added to the balance live.
Endpoint Setting
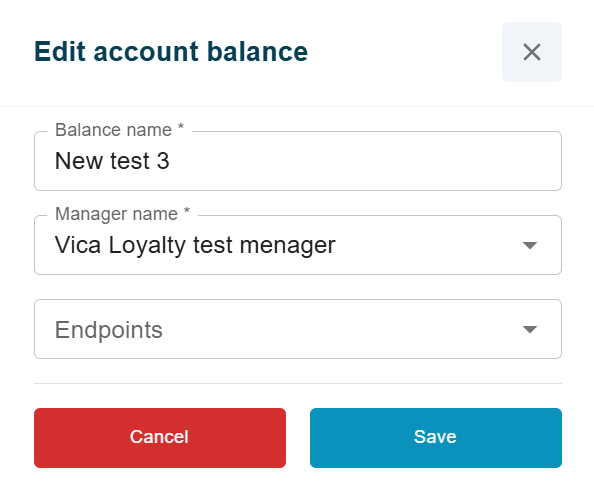
There is possibility to selecting one or more endpoints for each balance, according to which balance will be calculated.
Endpoint can be added when creating a balance:

Or it can be specified for an existing balance by clicking on one of the area highlighted in the picture:

This picture also displays the difference between the balances configured with and without the specified Endpoint.
Multiple Balances In One Currency
There can be several balances configured for the same currency.
In this case, only one of the balances can be without the specified Endpoints. When creating all subsequent balances, it is mandatory to specify the Endpoint. The calculation is made for each balance separately: the balance without the specified Endpoints is counted only for those Endpoints for which a separate balance has not been created.
Account configuration override
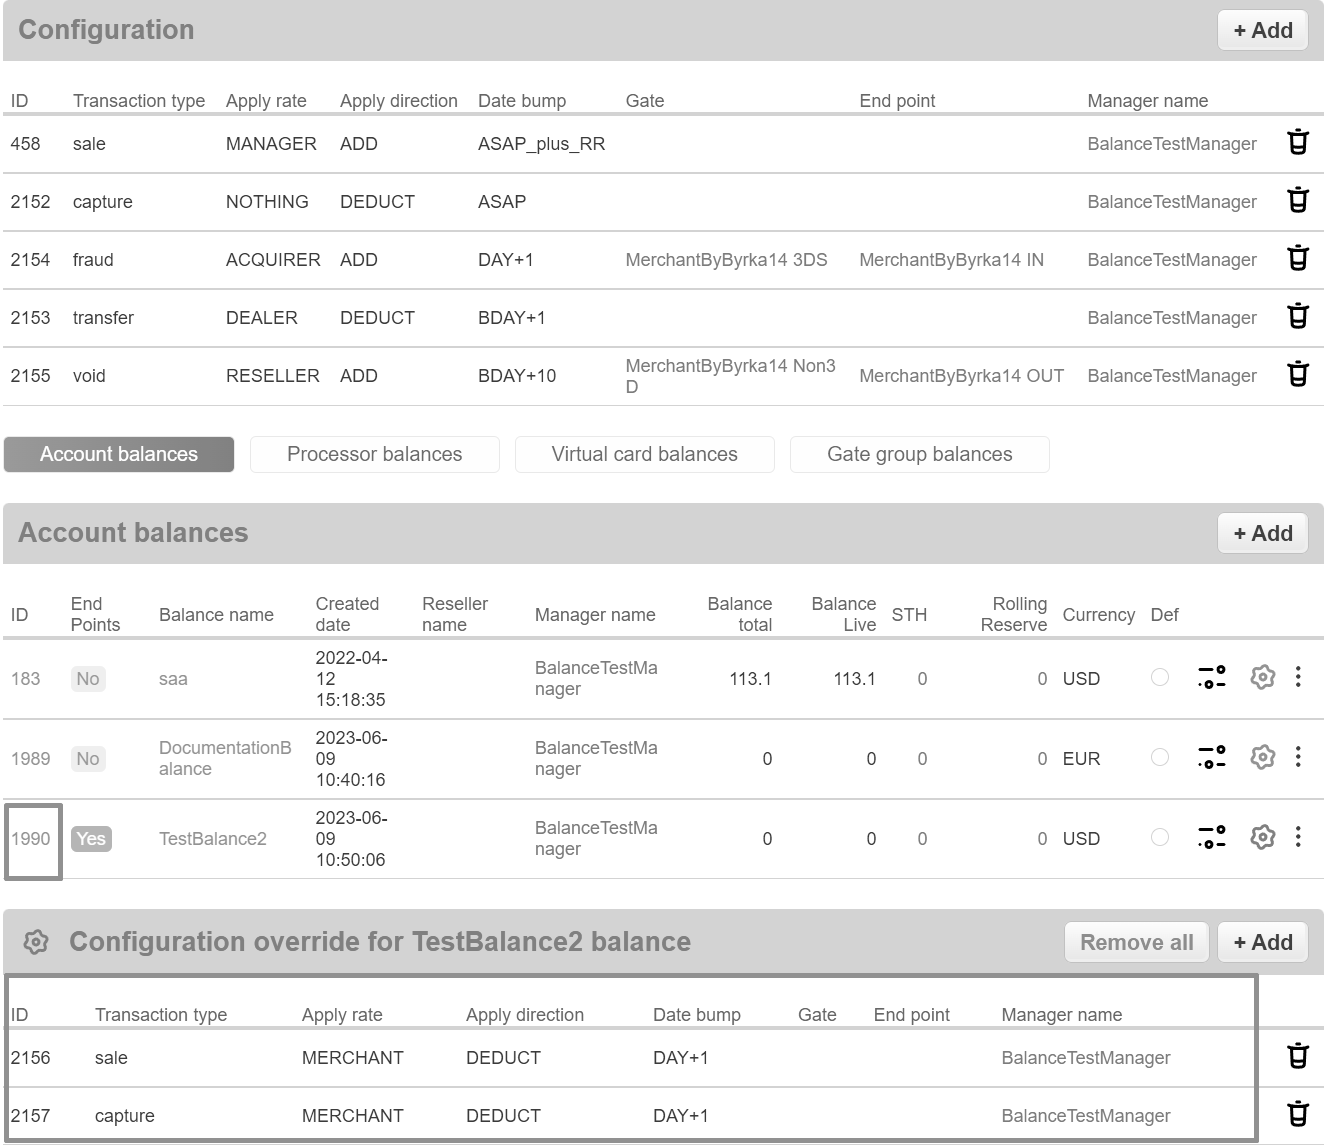
There is possibility to change configuration for every balance (not for all Merchant’s balances).
For this case need to press Configuration button as in the picture below:

And after this press the Add button:

In this window can be changed the balance settings as well as in the Configuration
Warning
If at least one operation type is overrode, balance will count by overrode configuration and only for overrode operations. If there is no override for operation types, than balance will counts by main configuration.
Example: For balance 191 Sale and Payout operations are overrode, that means for this balance main configuration doesn’t affect.
To remove configuration override press Remove all button and confirm the deletion.
Creation Date Changing
To change balance created date press Change created date button:

Select date of creation and press Update button:
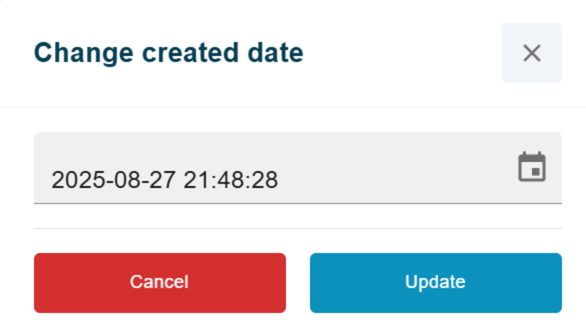
After changing the creation date, use reconciliation to recalculate the balance.
Export Balance Transactions
To use Balance reconciliation press on Reconciliation balance button:


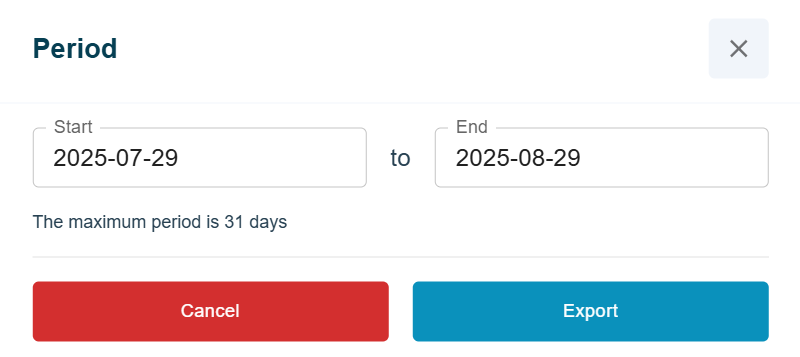
Note
The maximum period is 31 days.
Note
The date is counted as [day_From, day_To), so the last day will not be included in the interval.
CSV file contains the following fields:

Warning
“Reserve date” and “STH date” fields are the date and time when amount will affect the balance. The STH date in report doesn’t count hourly period described in balance types.
Balance Reconciliation
Reconciliation allows to recalculate balance after changes.
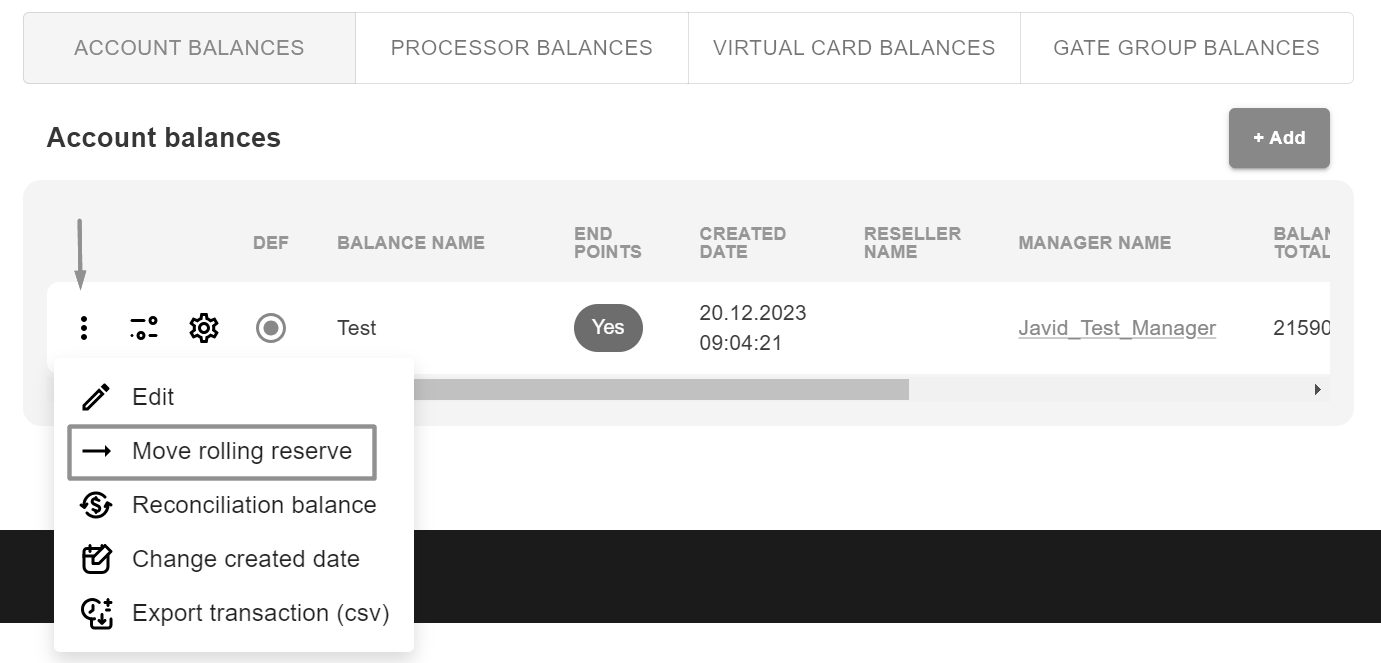
To reconcile balance press 3 dots near balance then Reconciliation Balance button and after Reconcile button:

Note
Only Total and Live balances are reconciled. RR and STH can not be reconciled; their amount will be credited to live balance according to the configuration at the time the transaction was created.
Move Rolling Reserve allows to manually transfer the Rolling Reserve to the active balance, before the release date of the holding. To move Rolling Reserve press 3 dots near balance then Move Rolling Reserve button:
Adjustments
Adjustments allows to change balances amount without making any transactions.
List of adjustments and full adjustment amount can be viewed by clicking on Adjustments button:

For the convenience of users, adjustments can be sorted by ID using the button below:

Manual Adjustment
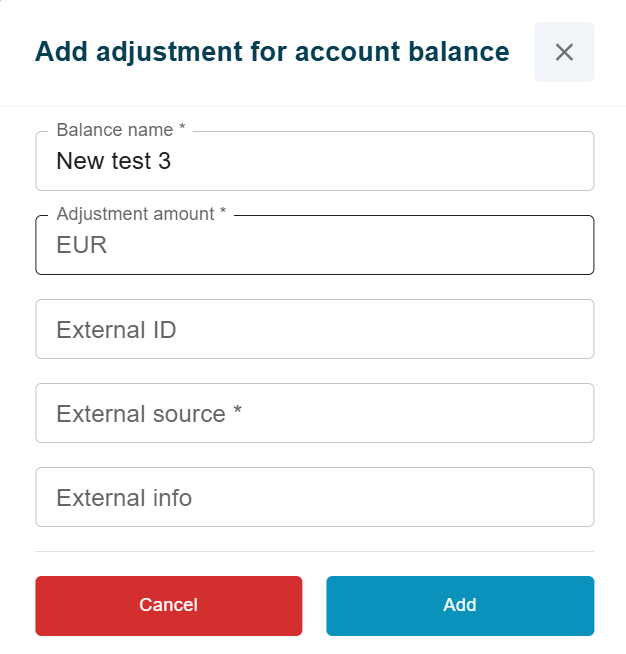
Adjustment amount and external source of the adjustment are mandatory. Adjustments for balance can be made via Add+ button:

When adding adjustment, next fields can be specified:
Adjustment amount
External ID
External source
External info
Note
Adjustment amount and External source are mandatory fields:
Adjustment API
In addition to manual adjustments, it is possible to make adjustments via API.
To do this, a tsv has to be created, zipped and sent via the API. API command with examples is specified in the integration documentation.
Export Adjustments
To export all adjustments for specific balance press the Export button, specify period of time and after that press Export button. The csv file of adjustments will download automatically.
Note
The maximum period is 31 days
Downloaded file contains next fields:
Create Date
Adjustment Amount
Adjustment Application Date
External Adjustment Unique Id
External Source Name
External Adjustment Info
The first line of the file contains the period and the sum of all adjustments.

Scheduled Adjustment
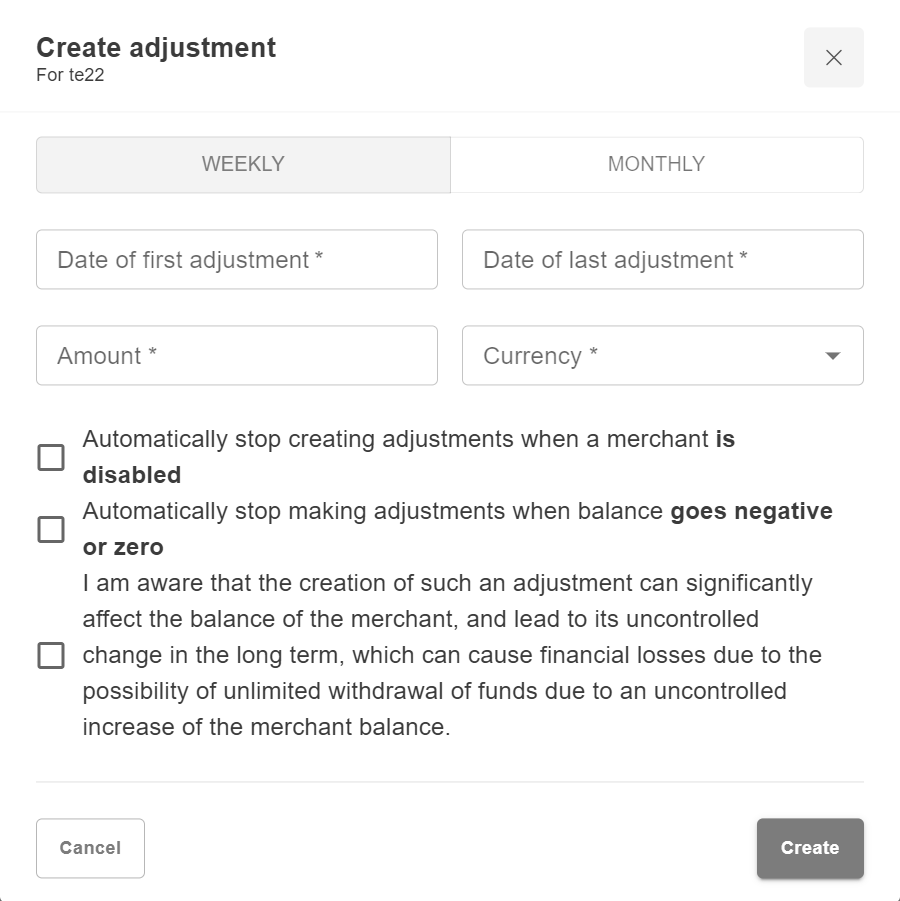
This functionality helps to configure a monthly/weekly fee, which can be set up on the appointed dates every month/week. Scheduled for balance adjustments can be made via Add+ button :

When adding adjustment, next fields can be specified:
Date of first adjustment
Date of last adjustment
Amount
Currency
Automatically stop creating adjustments when a merchant is disabled
Automatically stop making adjustments when balance goes negative or zero
I am aware that the creation of such an adjustment can significantly affect the balance of the merchant, and lead to its uncontrolled change in the long term, which can cause financial losses due to the possibility of unlimited withdrawal of funds due to an uncontrolled increase of the merchant balance. This checkbox is mandatory
Status indicates whether the adjustment is active or not. It can also be turned on or off by clicking on it:

ID is unique identifier of the scheduled adjustment:

Period shows which schedule is selected for the following adjustment:

Date shows time interval from first adjustment to the last adjustment:

Next schedule date shows when is the next scheduled adjustment:

Last run date shows when was the last scheduled adjustment:

Amount shows the adjustment amount:

Automatic shows in which conditions scheduled adjustment will be stopped:
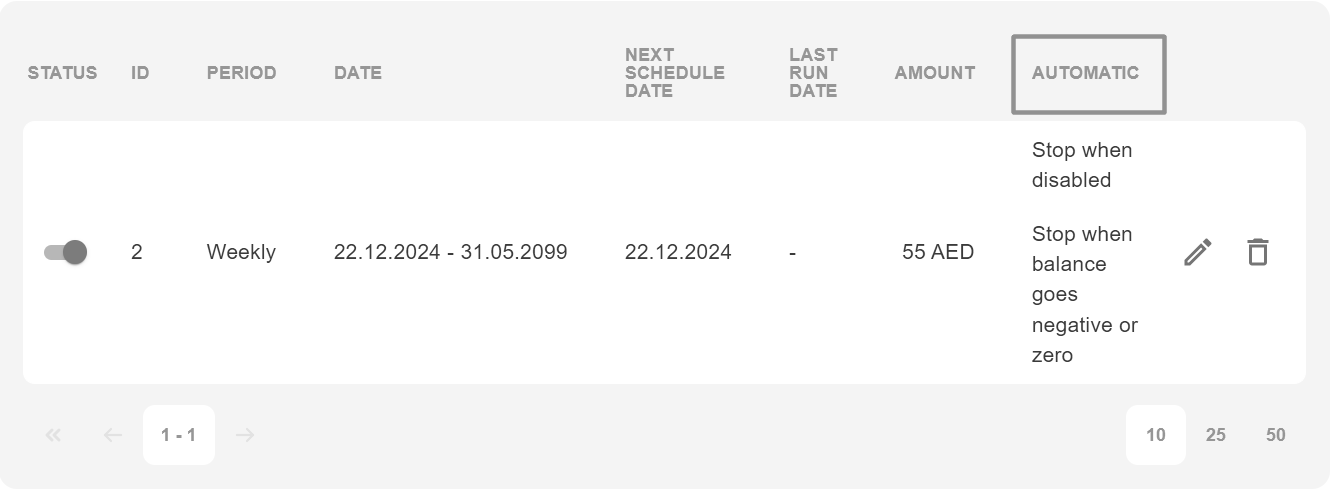
Edit can be used to edit scheduled adjustment:

Delete can be used to delete scheduled adjustment:
